Entries from 2011
Making it Easy for Visitors to Share Your Content with AddThis.com
With how common social networking tools like Facebook and Twitter are becoming I wanted to make it easier for website visitors to share our (the organization I work for) content with their colleagues. Instead of developing my own solution, I decided to utilize AddThis.com which provides a customizable widget that can be embedded in your website. According to their website, the widget currently allows visitors to share content with more than 300 services around the world.
For our website, we chose the standard "Website" option and the small sharing buttons shown in Figure 1.
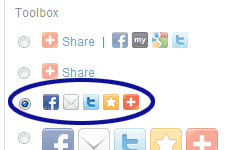
Figure 1. AddThis.com Button Type
Default Code
The default code provided by AddThis.com dynamically lists the share buttons based on how your visitors use them. For example, if most of your users share content on Twitter then "addthis_button_preferred_1" in the code below will show the Twitter button:
<div class="addthis_toolbox addthis_default_style">
<a class="addthis_button_preferred_1"></a>
<a class="addthis_button_preferred_2"></a>
<a class="addthis_button_preferred_3"></a>
<a class="addthis_button_preferred_4"></a>
<a class="addthis_button_compact"></a>
</div>
<script type="text/javascript" src="http://s7.addthis.com/js/250/addthis_widget.js#username=YourUsernameHere"></script>
<!– AddThis Button END –>
Note that "YourUsernameHere" needs to be replaced with your username provided by AddThis.com.
Choosing the Buttons
Instead of using the default code, we always want to show the Facebook, LinkedIn, Twitter, and e-mail buttons. So we changed the "addthis_button_preferred_1", "addthis_button_preferred_2", etc. to:
<div class="addthis_toolbox addthis_default_style">
<a class="addthis_button_facebook"></a>
<a class="addthis_button_linkedin"></a>
<a class="addthis_button_twitter"></a>
<a class="addthis_button_email"></a>
<a class="addthis_button_compact"></a>
…
Note that we also kept the orange plus-sign button so that visitors have the option to share with their preferred social networking tool.
Adding a Label
To make the purpose of the buttons more obvious, we wanted to add a label to the left of the buttons. Well if you just add the label before the first button, the label magically moves to the right of all the buttons when viewed on the Web. To keep the label to the left, you'll need to surround it with an HTML tag like "<span>" and add the "addthis_separator" class:
<div class="addthis_toolbox addthis_default_style">
<span class="addthis_separator">Share: </span>
<a class="addthis_button_facebook"></a>
…
Right Align the Widget
Before embedding the AddThis.com widget into our website we needed to make one last modification. Due to the location of the widget we wanted to float it to the right:
<div class="addthis_toolbox addthis_default_style" style="float:right;">
…
What if JavaScript is Disabled?
Since the AddThis.com widget doesn't work without JavaScript, you may want to add some extra code to hide any trace of the widget when someone visits your website with JavaScript disabled. The extra code will be added using the <noscript> tag.
<script type="text/javascript" src="http://s7.addthis.com/js/250/addthis_widget.js#username=YourUsernameHere"></script>
<noscript>
<style type="text/css">
/* sharing widget doesn't work without JavaScript, so we don't need to display it if JavaScript is disabled */
.addthis_toolbox { display:none; }
</style>
</noscript>
<!– AddThis Button END –>
Final Modified Code
Once you're satisfied with the setup of your widget, you'll need to embed it into your website. I would recommend incorporating the code so it's easy to modify or remove. That way if Twitter becomes less relevant or if AddThis.com goes out of business for example, it should be simple to update the code as necessary or remove it altogether.
For reference, here is the entire modified AddThis.com code:
<div class="addthis_toolbox addthis_default_style" style="float:right;">
<span class="addthis_separator">Share: </span>
<a class="addthis_button_facebook"></a>
<a class="addthis_button_linkedin"></a>
<a class="addthis_button_twitter"></a>
<a class="addthis_button_email"></a>
<a class="addthis_button_compact"></a>
</div>
<script type="text/javascript" src="http://s7.addthis.com/js/250/addthis_widget.js#username=YourUsernameHere"></script>
<noscript>
<style type="text/css">
/* sharing widget doesn't work without JavaScript, so we don't need to display it if JavaScript is disabled */
.addthis_toolbox { display:none; }
</style>
</noscript>
<!– AddThis Button END –>
Related Resources
- AddThis.com – where you can sign up for your own account and get the sharing widget.
Remember, It’s 2011: Tips for Remembering the New Year
 It's that time of year again. The time when people vow to change some aspect of their life. Maybe they want to get in shape, stop smoking, get out of debt, etc. Well here is my suggestion for a New Year's resolution.
With the new year comes…well a new year. It's 2011, but some of us have a difficult time dealing with the change. We're so used to typing 2010 that our brain continues that trend in January. Over the past few years I've been working toward getting past this road block. Here are the techniques that seem to work for me:
- 2011 Mantra – throughout the day I find it useful to tell myself "It's 2011. It's 2011…" in an attempt to bring the current year to the forefront of my mind. For me the mantra works best in the morning while getting ready for work. And I repeat the process whenever I find myself typing the incorrect year.
- Double Check Your Work – even when I remember it's 2011, my brain still finds a way to type 2010. So I'm always in the habit of double checking dates.
- Post-it Note Reminder – for the first year of attempting to remember the year, I stuck a Post-it note to my computer that said "It's 2011". In addition to helping me remember the date, the note reminded to keep up with the other techniques.
Now keep in mind, this type of mistake is very common this time of year. So if you're in charge of posting information online for someone else you'll need to double check their work also. If you notice any mistakes, don't forget to let them know. That way they can correct the mistake on their end before sending the information to anyone else. Even if they don't send the information, letting them know may help them avoid making the mistake again.
Luckily this type of mistake seems to be so common that your audience may not even notice it. If they do notice they'll probably know what you mean. Of course it's still a good idea to type the correct year.
Feedback
Do you have any tips or tricks for remembering the correct year? Or maybe you would like to share a funny or interesting story of a time where you (or a "friend") listed the wrong year?
Adding an Audio Player to Your Libsyn.com Hosted Show Notes
At work I was asked to solve an issue with the website associated with our podcast. The problem was that the default player provided by our host (Libsyn.com) wasn't meeting our needs. On several occasions the player wouldn't play the most recent podcast episode. We also didn't like that if you were viewing the show notes for an older episode the player would still play the most recent episode which confused our visitors.
Note that the following directions are for Libsyn's publishing system version 3.4.2 (rev. 1764)
Custom Player Code
There are many audio players to choose from; we decided to use one provided by Google:
Note that you'll need to replace the "http://traffic.libsyn.com/YourUsername/YourAudioFile.mp3" part with the website address for your podcast episode.
Adding the Custom Player
To add the custom player code to your show notes, you'll need to:
- Log into the Libsyn publishing system
- Click the show posts button near the top-left of the page (See Figure 1)
- Click the "Edit" link for the post that needs the custom player (See Figure 2)
- Click the "HTML" button (See Figure 3)
- Insert the custom player code where you want it to appear in the show notes (See Figure 4)
- Click the "Update" button
- Note that you should see the player if it was added properly. You should also be able to hear the podcast episode by clicking the play button on the player. (See Figure 5)
- Click the "Publish" button
- Repeat steps 3 – 7 for the other posts which need the custom player
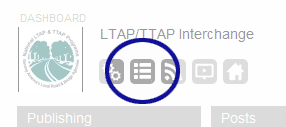
Figure 1. Show Posts Button
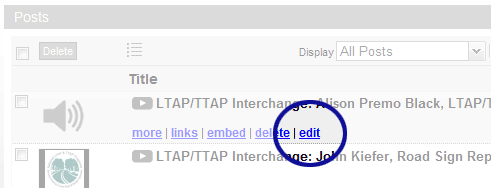
Figure 2. Edit Post Link
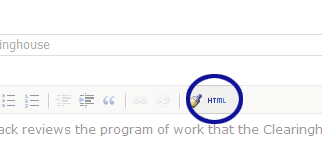
Figure 3. HTML Button
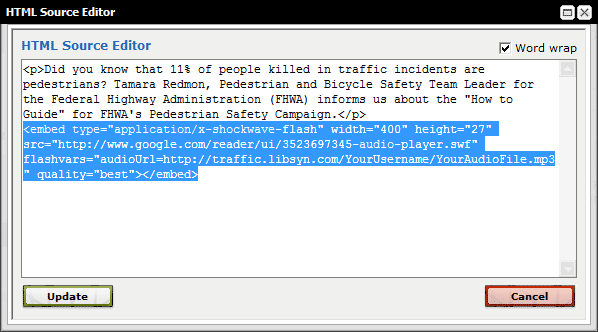
Figure 4. HTML Code Window
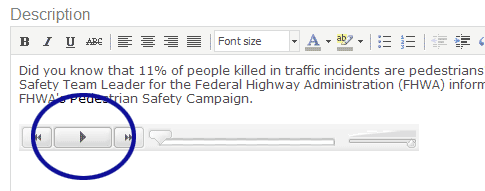
Figure 5. Player Added to Show Notes
Removing the Default Libsyn Player
Once all the custom audio players are in place we no longer need the default player provided by Libsyn. To remove the player, you'll need to:
- Log into the Libsyn publishing system
- Click the "Destinations" button (See Figure 6)
- Click the "Libsyn Classic Blogpage" option (See Figure 7)
- Locate the code used to display the Libsyn player in the Blogpage HTML/Code edit box (See Figure 8)
- Comment out the Libsyn player code (See Figure 9)
- Note that you could also delete the code, but you may want to save the code in a text file for later. You never know when you might want to add the Libsyn player again.

Figure 6. Destinations Button
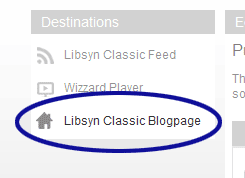
Figure 7. Libsyn Classic Blogpage Option
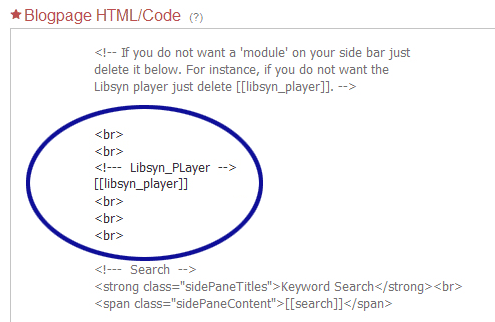
Figure 8. Libsyn Player Code – Before Being Commented Out
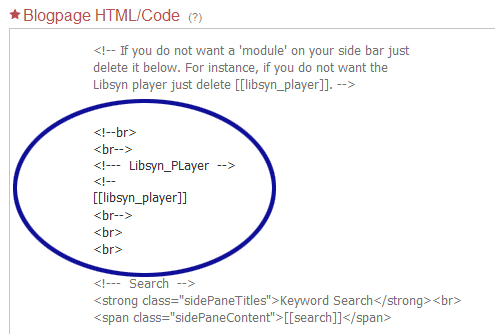
Figure 9. Libsyn Player Code – After Being Commented Out
Related Resources
- Libsyn.com – If you publish a podcast, you're probably familiar with Liberated Syndication (Libsyn). According to their website, Libsyn is the world's largest podcast network that distributes more than 15,000 podcasts.
- Yahoo! Media Player – Another player option that automatically pulls all audio links on the page to create a playlist.

