Using Gmail to Automatically Send Troubleshooting E-mails
Recently, a request came through asking how to handle the troubleshooting aspect of an online seminar. Due to budget constraints, hiring someone to provide tech support was out of the question and with the event being two days away, we needed a solution quick. They were only looking to handle the problems/fixes common to the online seminar service we use, so my first reaction was to set up an auto-responding e-mail address.
One goal behind setting up this auto-response was to give the impression that no one was monitoring the e-mail address, so we created a brand new address. We would have preferred to use an e-mail address that ended with the organization's domain name, but we weren't able to utilize the auto-reply feature due to technical limitations. Instead we chose to use Google's Gmail service.
Of course our first step is to create Gmail account. But keep in mind, if you already have a Google account for their other services (Google Docs, Google Calendar, etc.) and you don't use Gmail, you might want to create the e-mail address under a different account. Otherwise Google will force you to use the new Gmail address as the primary e-mail for your account.
Enabling Canned Responses
After creating a Gmail account, you need to enable Canned Responses in order to indicate what auto-responder should say:
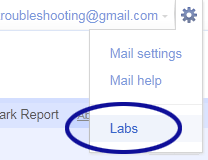
- Click the "Labs" link under the Options icon near the top-right side of the page (see Figure 1)
- Under Labs, locate Canned Responses and select "Enable" (see Figure 2)
- Click "Save Changes"

Figure 1. Labs link under the Options menu

Figure 2. Enable Canned Responses
Creating a Canned Response
With Canned Responses enabled, a new option should be available when composing messages. Unfortunately, the process for utilizing the feature isn't very intuitive. You'll need to
- Click "Compose mail"
- Type the text for your canned response in the message body
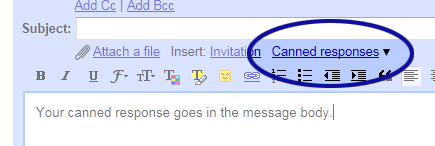
- Click the "Canned responses" option (see Figure 3)
- Under the Save section, click "New canned response…"
- A script prompt should pop up asking you to name the canned response (see Figure 4)
- Enter the name and click "OK"
- Click the "Discard" button to cancel the message

Figure 3. Canned responses option

Figure 4. Script prompt asking you to name the canned response
Creating the Auto-Responder
Now we can create the part which automatically responds to incoming messages. It may be tempting to use Gmail's vacation responder since it essentially does what we're looking for, but according to the fine print "If a contact sends you several messages, this automated reply will be sent at most once every 4 days." Well we want the message to be sent every time, so let's create our own:
- Click the "Mail settings" link under the Options icon
- Click "Filters"
- Click "Create a new filter"
- Under the "Doesn't have:" field type in something that will never appear in a message; maybe something like "4oju!jkl@g43j"
- Click "Next Step"
- Check "Send canned response"
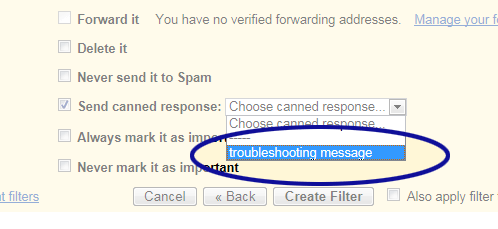
- Using the drop-down menu, choose the canned response created earlier (see Figure 5)
- Click "Create Filter"
With the auto-responder in place, you'll want to make sure everything works as expected. To do so, you just need to e-mail the Gmail account.

Figure 5. Choosing a canned response


0 Comments
There are currently no comments.
Leave a Comment